Bromcom Student Portal
The Bromcom Student Portal is a web-based system that helps students handle their school work in one place. Students can log in to check homework, class schedules, attendance, grades, messages, and other important school updates using a phone, tablet, or computer with internet access.
Many schools in the United Kingdom use Bromcom because it makes communication simple for students, teachers, parents, and school staff. It helps everyone stay connected and updated with school activities more easily.
Step-by-Step Bromcom Student Portal Login / Bromcom Mis Login
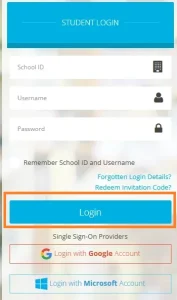
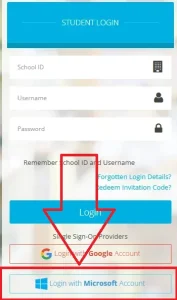
1. Open the Bromcom Student Portal Login Page
First, visit your school’s Bromcom Student Portal website. Your school usually provides the login link through email, the school website, or the IT department.
When the page opens, you will normally see:
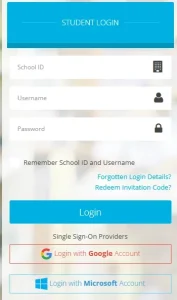
The Bromcom Login page is simple and easy to use. It looks similar to the portal image shown above.
2. Enter Your School ID
In the first box on the Bromcom Login page, type your School ID. This ID helps the Bromcom MIS portal find your school account correctly.
Your School ID is usually given by:
The School ID may look like:
If you cannot find your School ID:
Make sure you enter the correct School ID before moving to the next step
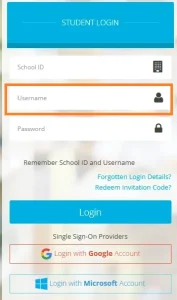
3. Enter Your Username
In the username box, type your student username.
This can be:

Example usernames:
Make sure you check:
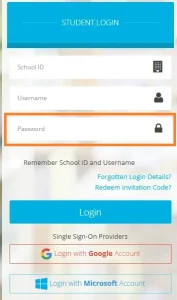
4. Enter Your Password
Now carefully type your password.
Keep these points in mind:
If you forgot your password:
5. Save Login Details (Optional)
You may see an option like:
“Remember School ID and Username”
If you turn this on:
But avoid using this option on:
6. Click the Login Button
Now press the Login button to continue.
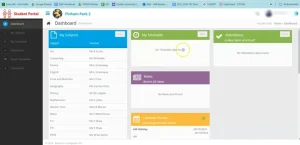
If your details are correct, your student dashboard will open.
From there, you can access:
Login with Google Account
Some schools let you sign in using Google.
Click on:
“Login with Google Account”
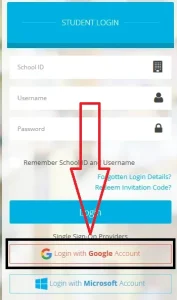
Then follow these steps:
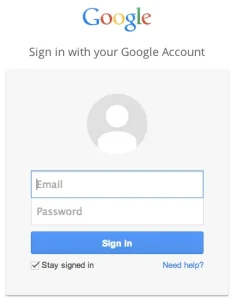
This option is usually used in schools that use:
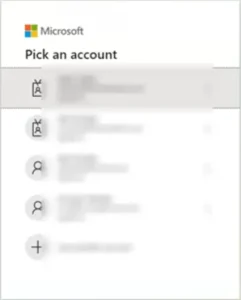
Login with Microsoft Account
Some schools use Microsoft 365 for login.
Click:
“Login with Microsoft Account”
Then do the following:
This login is common in schools that use:
Create Bromcom Student Portal User Accounts
This guide explains how to create user accounts for the Student Portal. You can do this with Single Sign-On or without it.
Without Single Sign-On
If Single Sign-On is not used, students will need a normal login account.
You will:
Students will use these details to sign in directly to the portal.
With Single Sign-On
If Single Sign-On is enabled, students can log in using their school account.
They can use:
No separate portal password is needed. They simply sign in with their school email.
Access and Permissions
To create or manage user accounts, you need the correct access rights.
You can find these permissions in:
Student Portal module → Config → Setup → Roles and Permissions
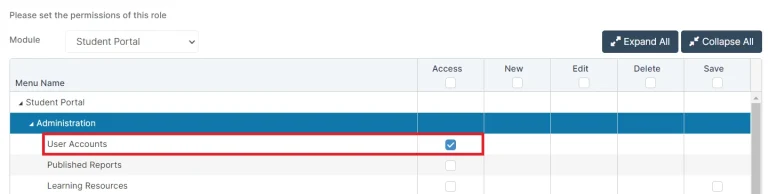
Make sure your role has the required access before you start managing accounts.
Without Single Sign-On
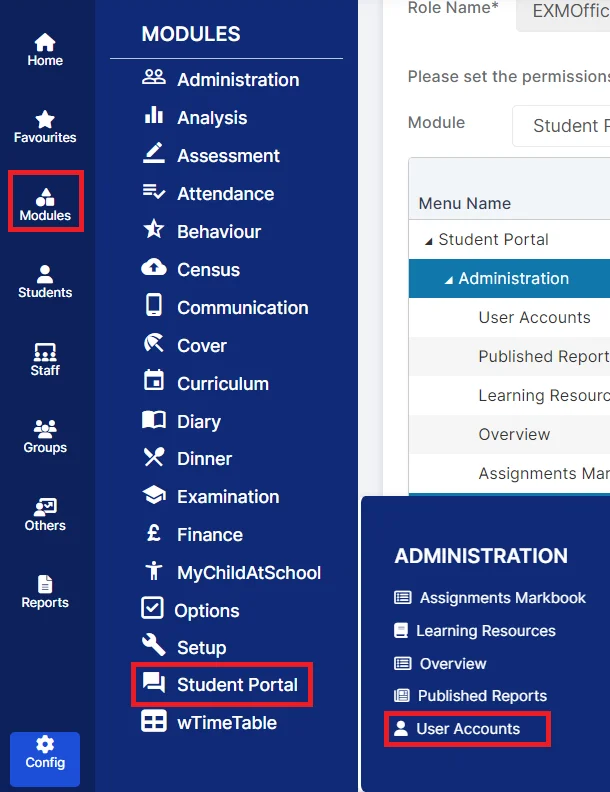
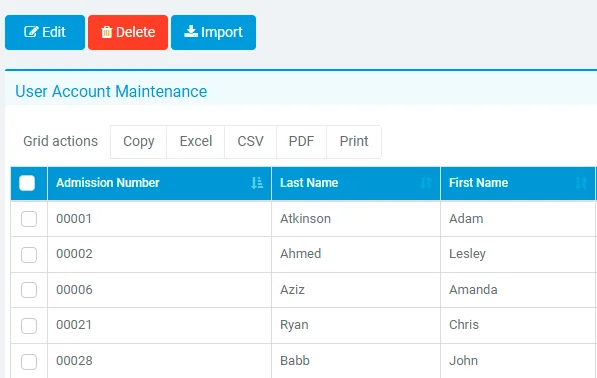
Modules > Student Portal > User Accounts
When the page loads, you will see all existing Student Portal user accounts.
These accounts will be listed on the screen.
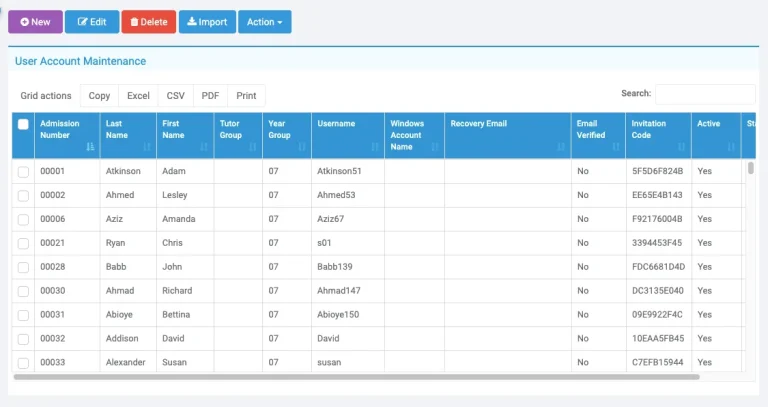
In this example, there are no existing accounts yet.
This is a fresh setup, so you can see the full process of creating Student Portal user accounts from the beginning.
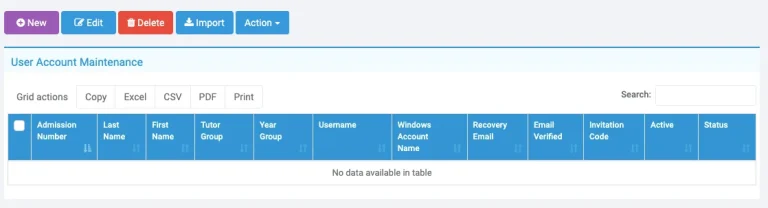
Creating New User Accounts
When the User Accounts page opens, it may look empty if no accounts have been created yet.
From here, click New.
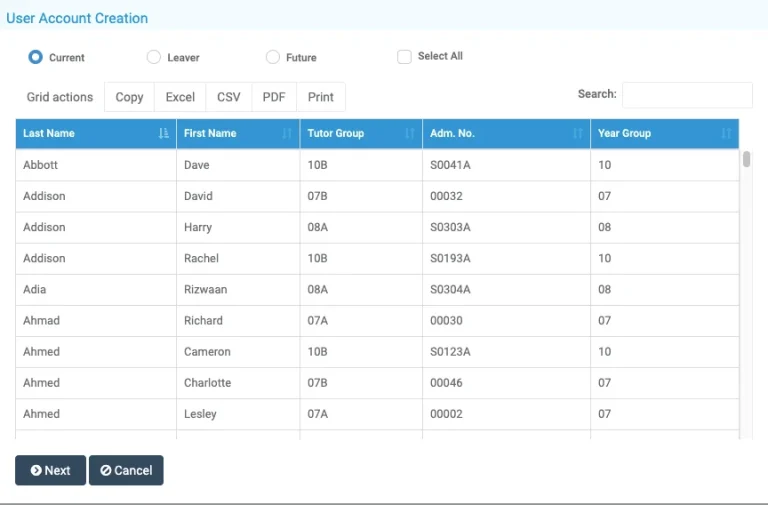
After clicking New, a new section will appear. This shows all students who do not yet have a user account.
You will also see three options:
- Current – students who are currently enrolled and on the school roll
- Leaver – students who have already left the school
- Future – students who will join the school later

Set the option to Current.
This will show all active students who are still on roll and do not have a user account yet.
You can either click Select All to choose every student at once.
Or, you can manually select only the students you want to create accounts for.
Once you have made your selection, click Next to continue.
Account Generation Page
After clicking Next, you will go to the account generation page.
Here, you can choose how to create the user accounts.
You have two options:
- Auto Generate Accounts
- Manually Generate Accounts
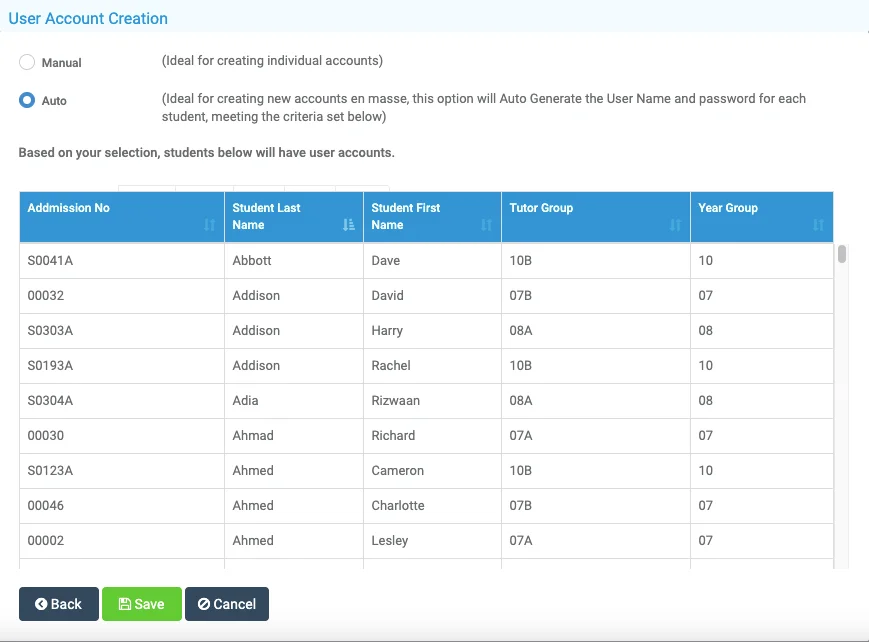
It is best to choose Auto Generate, especially when creating many accounts at once.
This helps because:
- all usernames follow the same format
- the process is faster and easier
- fewer mistakes are made
When you are ready, click Save to create the user accounts.
When you click Save, you will reach the final step where the user accounts are successfully created.
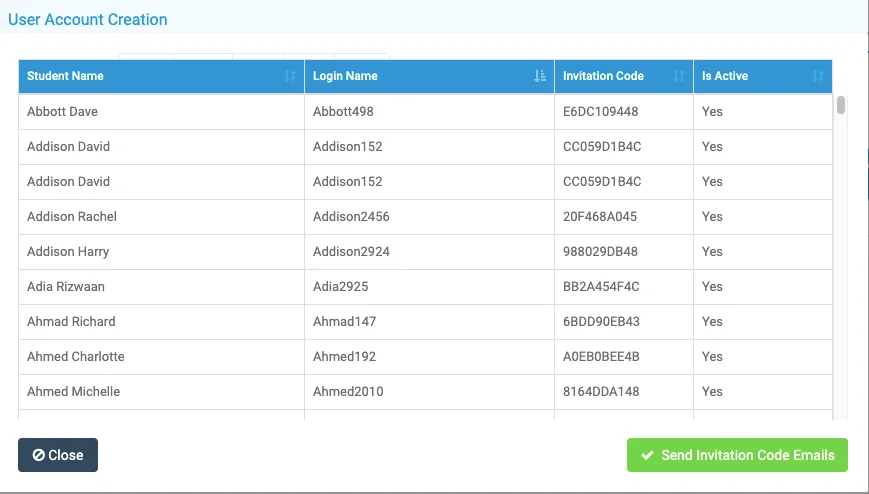
At this point, you have two options:
- Send Invitation Emails – this will email the login details to the selected students right away
- Close – this will finish the process without sending emails immediately
If you choose Close, you can still send the invitation emails later whenever you want.
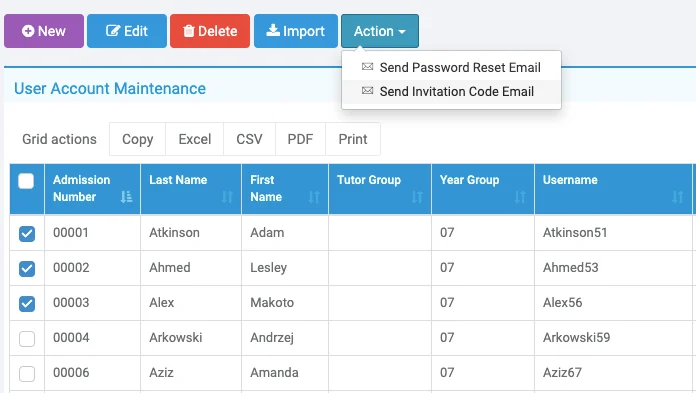
If you did not send the invitation emails earlier, you can still send them later from this page.
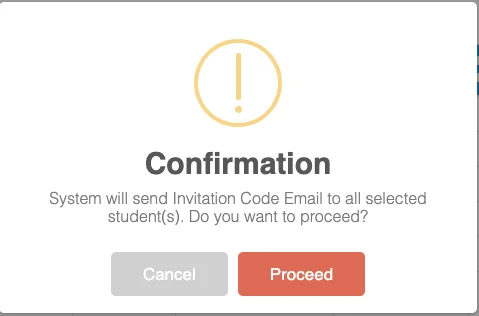
Go to the User Accounts screen and find the Action section.
From there, you can send the Invitation Code Emails to the selected students.
The graduation cap icon will now appear green.
Before a user account was created, this icon was grey.
This change shows that the student now has an active user account.

With Single Sign-on
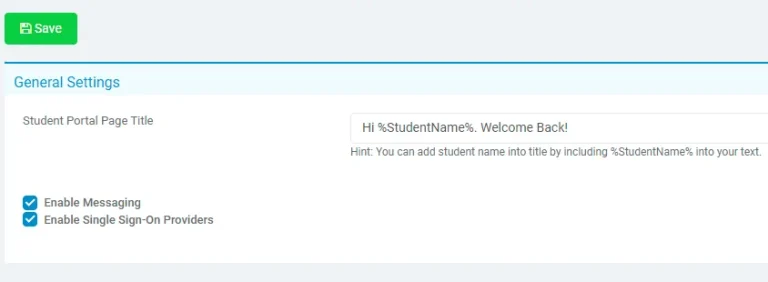
You can find this setting in:
Config > Student Portal > General Settings
With SSO enabled, students do not need separate login details created in the same way. Instead, they will sign in using their school account, such as Google or Microsoft.
This makes the login process simpler and more secure compared to the standard method without SSO.
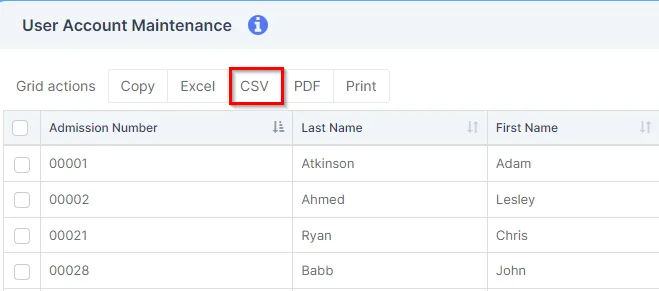
Modules > Student Portal > User Accounts
Here, you will not create accounts manually.
Instead, you will only have the option to import new user accounts.
This is because login details are handled through the SSO provider, not created inside the system.
This will download the required template.
You must use this CSV file because it has the correct format for importing Student Portal user accounts.
When editing the file, make sure you do not change the column headings.
The headings must stay exactly the same, otherwise the import process will fail and the user accounts may not upload correctly.
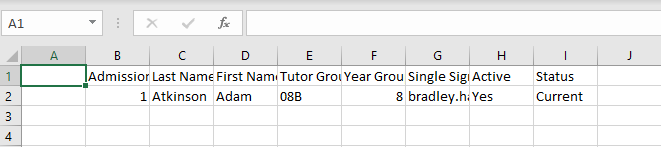
Under each heading, enter the correct information for every student and then save the file.
After adding all the student details, return to the User Accounts page and upload the CSV file.
The system will then import the file and automatically create the student user accounts for you.
Note: New user accounts must be connected to a Google or Office 365 email address to use Single Sign-On (SSO). When adding new students to the Student Portal, you only need to create a CSV file with the new students’ details. You can then import that file to create their accounts. This process will not replace or remove any existing students already stored in the MIS system.
Forgotten Details In Bromcom Student Portal
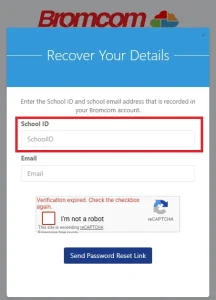
Step 1: Open the “Recover Your Details” Page
Go to your school’s Student Portal login page.
Click on Forgotten Details or Forgot Password.
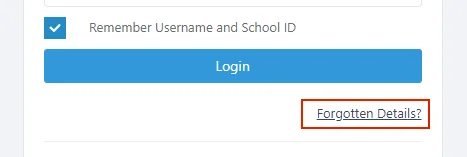
You will see a screen like this:

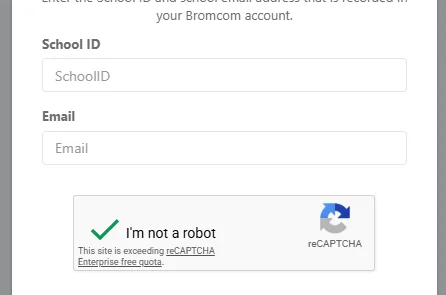
Step 2: Enter Your School ID
Type your School ID in the first box.
This is usually provided by your school or college.
Example:
Step 3: Enter Your School Email Address
In the Email field, enter the same email address linked to your Bromcom account.
Make sure:
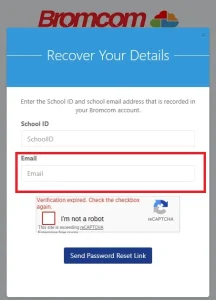
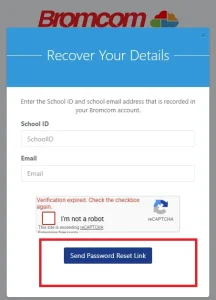
Step 4: Complete the reCAPTCHA
Tick the I’m not a robot checkbox.
You may need to:
Step 5: Click “Send Password Reset Link”
Press the Send Password Reset Link button.
Bromcom will send a password recovery email to your registered email address.
Step 6: Check Your Email Inbox
Open your email account and look for the reset email.
Also check:

Step 7: Create a New Password
Open the reset link from the email.
Then:
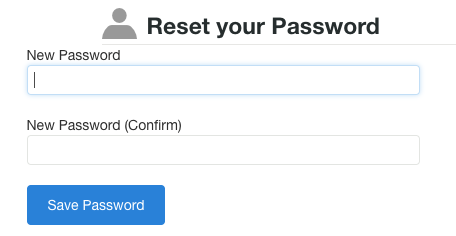
Your Bromcom account password is now updated.
Apps For Bromcom Student Portal
Features Of Bromcom Student Portal
Dashboard
The Dashboard is the main page of the student portal.
It gives students a fast overview of important details such as:
Students can see all important information on one screen without opening many pages.
My Subjects
The My Subjects section shows all the classes a student is taking during the school year.
This section may include:
Some examples of subjects are:
This feature helps students understand:
My Timetable
The My Timetable section shows the student’s daily class schedule.
Students can check:
Benefits of this feature:
Some student portals also show weekly and monthly timetable views.
Attendance Tracking
The Attendance section helps students see their attendance records.
Students can view:
This feature helps students:
Parents can also use this feature to monitor attendance.
Exam Timetables
The Exam Timetable feature shows all exam schedules.
Students can check:
This helps students prepare early and stay ready for exams.
Homework Management
The Homework section allows teachers to upload assignments online.
Students can:
Benefits of homework management:
Some portals also support online file uploads for homework submission.
School News and Announcements
The News section shares important school updates and notices.
Examples include:
Students can stay informed without needing paper notices.
Calendar Events
The Calendar Events feature shows upcoming school activities and important dates.
It may include:
Benefits:
- Helps students plan ahead
- Keeps important dates organized
- Improves time management
Navigation Menu
The menu on the left side helps students move easily between portal sections.
Common menu options include:
This simple design makes the student portal easy to use for everyone.
User Profile and Settings
Most student portals also include account settings.
Students can:
This helps keep student accounts safe and secure.
Mobile and Online Access
Modern student portals work on many devices, including:
Students can open the portal anytime using an internet connection.
Benefits of a Student Portal
Better Communication
Students, teachers, and parents can communicate more easily.
Saves Time
All school information is available online in one place.
Better Organization
Students can manage homework, exams, and class schedules more easily.
Quick Access to Information
Important records and updates are available anytime.
Supports Online Learning
Students can continue learning from home when needed.
Common Issues and Easy Fixes
Login Problems
You cannot log in to the portal.
Why it happens
Easy fixes
Forgot Password
You forget your password and cannot sign in.
Solution
Account Not Found
You see “account not found” or “invalid user”.
Why it happens
Fix
Timetable Not Showing
Your class timetable is missing.
Why it happens
Fix
Attendance Not Correct
Attendance shows wrong or missing info.
Why it happens
Fix
Homework Not Visible
Homework section is empty.
Why it happens
Fix
Portal Not Loading or Slow
Website is slow or not opening.
Why it happens
Fix
Mobile App Not Working
The app crashes or does not open.
Fix
Notifications Not Coming
No alerts for homework or messages.
Why it happens
Fix
Wrong Student Details
Wrong name, class, or information shown.
Why it happens
Fix
FAQ’s
Conclusion
Bromcom Student Portal is a modern and easy-to-use school system that helps students, parents, and teachers stay connected. It brings all important school information like homework, attendance, timetable, and results into one simple online platform.
The system is designed to save time and make school work more organized. Students can quickly check updates, submit work, and stay on track with their studies. Parents can also monitor progress and attendance easily.